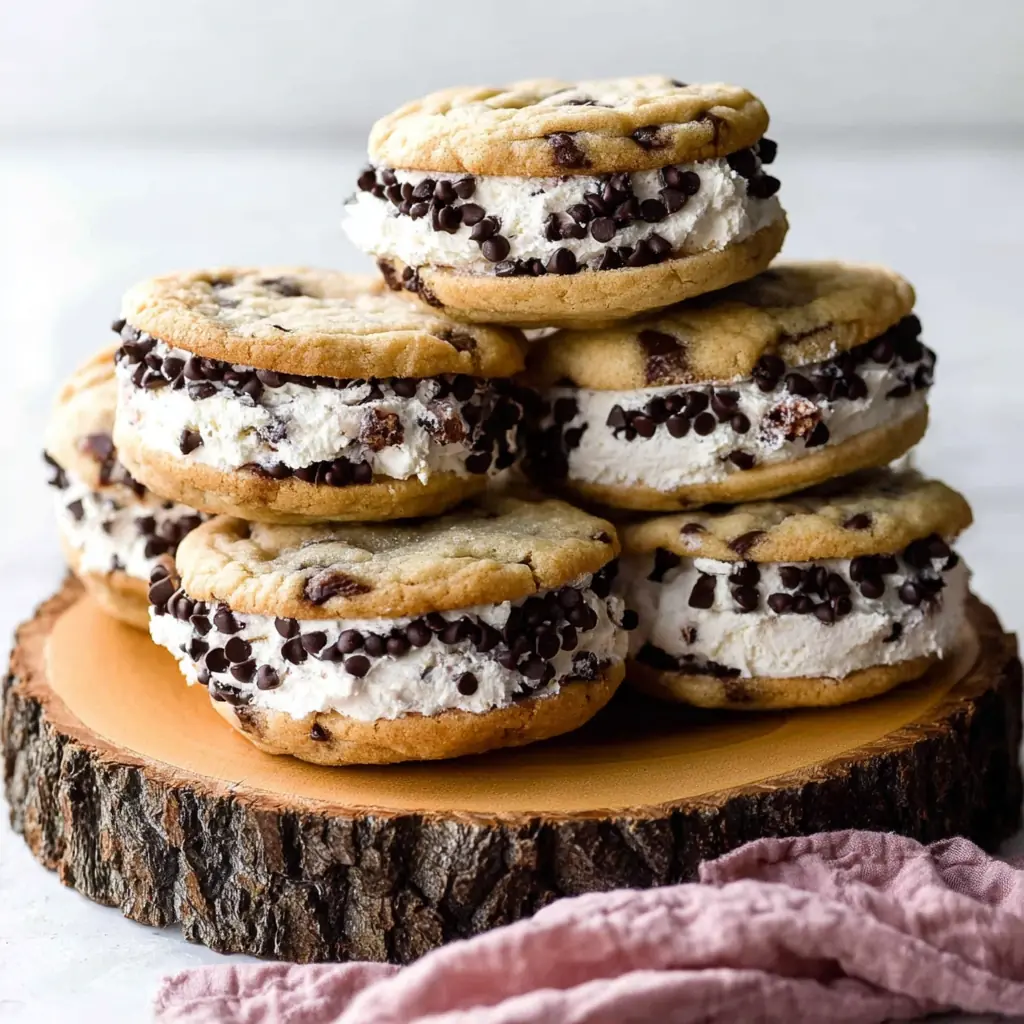
DIY Ice Cream Sandwiches bring together soft chocolate chip cookies, creamy vanilla ice cream, and colorful toppings for a cool homemade dessert everyone loves. These cookie sandwiches taste like a bakery-style Chipwich, yet they come together right in your kitchen with simple ingredients. Whether you need festive sprinkle sandwiches for a holiday party or a fun kids summer dessert for warm afternoons, this easy recipe delivers soft cookies, creamy filling, and freezer-friendly convenience in every bite.
Story
I started making DIY Ice Cream Sandwiches during summer weekends when everyone wanted something cold but still homemade. The soft cookies stay chewy even after freezing, which makes these sandwiches much better than many store-bought versions. I also love how flexible DIY Ice Cream Sandwiches can be because you can switch the ice cream flavors, toppings, and sprinkles for every occasion. During patriotic holidays, I turn them into red white and blue treats with colorful sprinkles, while birthdays call for rainbow toppings and chocolate drizzle. Since this recipe skips cookie dough chilling, the process stays simple and quick from start to finish.
Ingredients
- 2 and 1/4 cups all-purpose flour
- 1 and 1/2 teaspoons cornstarch
- 1 teaspoon baking soda
- 1/2 teaspoon salt
- 3/4 cup unsalted butter, softened
- 3/4 cup packed brown sugar
- 1/2 cup granulated sugar
- 1 large egg
- 1 egg yolk
- 2 teaspoons pure vanilla extract
- 1 and 1/4 cups mini semi-sweet chocolate chips
- 3 cups vanilla ice cream
- 1 cup mini chocolate chips, sprinkles, or finely chopped nuts for rolling
Step-by-Step Instructions
Preparing the Ingredients
Preheat the oven to 350°F and line baking sheets with parchment paper. Whisk the flour, cornstarch, baking soda, and salt in a medium bowl until combined. In a separate large bowl, beat the softened butter, brown sugar, and granulated sugar until creamy and smooth. Add the egg, egg yolk, and vanilla extract, then mix again until fully combined. Gradually mix the dry ingredients into the wet ingredients on low speed before folding in the mini chocolate chips. Scoop portions of dough onto baking sheets, leaving space between each cookie for spreading during baking.
Cooking Instructions
Bake the cookies for 12 to 13 minutes until the edges turn lightly golden while the centers stay soft. Let the cookies cool on the baking sheet for several minutes before transferring them to a wire rack. Once cooled, flip one cookie upside down and add a generous scoop of ice cream to the center. Spread the ice cream gently toward the edges, then place another cookie on top to create a sandwich. Press lightly in the center to secure the filling, then roll the edges in chocolate chips, sprinkles, or chopped nuts. Wrap each sandwich and freeze for at least 3 hours before serving for the best texture.
Tips for Perfect Results
Common Mistakes to Avoid
Many people overbake the cookies, which creates hard sandwiches after freezing, so remove them while the centers still look slightly soft. Warm cookies can also melt the ice cream quickly, so always cool them completely before assembly. Using regular chocolate chips instead of mini chips can create uneven cookie texture, while overfilling the sandwiches makes them difficult to freeze neatly. For cleaner sandwiches, freeze the assembled treats immediately after rolling the edges in toppings.
Pro Tips for Better Flavor
Use high-quality vanilla ice cream because its flavor stands out in every bite. Mini chocolate chips distribute evenly through the cookies and create a softer texture after freezing. If you want extra festive DIY Ice Cream Sandwiches, decorate the edges with seasonal sprinkles or crushed cookies. A light sprinkle of flaky sea salt on top also balances the sweetness beautifully. For even softer cookies, store the sandwiches tightly wrapped in parchment paper before freezing.
Serving and Storage
How to Serve
Serve DIY Ice Cream Sandwiches directly from the freezer after letting them sit at room temperature for 2 to 3 minutes for easier biting. These sandwiches pair perfectly with cold milk, iced coffee, or fresh berries during summer gatherings. You can also arrange them on a chilled tray with colorful toppings for parties, cookouts, or birthday celebrations. Since they look bright and playful, they work especially well as a fun centerpiece for children’s dessert tables.

How to Store Leftovers
Wrap each sandwich individually in parchment paper or plastic wrap to keep freezer flavors away from the cookies and ice cream. Store the wrapped sandwiches inside a freezer-safe container for up to 3 months. For the best texture, avoid repeated thawing and refreezing because that can create icy filling and soggy cookies. When ready to enjoy, let the sandwiches soften slightly at room temperature before serving.
Conclusion
DIY Ice Cream Sandwiches combine soft homemade cookies, creamy ice cream, and colorful toppings into one unforgettable frozen dessert. The recipe stays simple enough for beginners while still delivering bakery-style results that feel special for celebrations and warm summer evenings. Since you can customize every part of the sandwich, these treats fit birthdays, patriotic holidays, backyard parties, and everyday cravings alike. Once you try this easy homemade version, you may never want store-bought ice cream sandwiches again.
Discover more delicious recipes by following me on Facebook and Pinterest.
Frequently Asked Questions
Can I make DIY Ice Cream Sandwiches ahead of time?
Yes, these sandwiches work perfectly as a make-ahead dessert because they freeze well for up to 3 months. Wrap each sandwich individually to maintain freshness and prevent freezer burn while storing.
What ice cream flavors work best for cookie sandwiches?
Vanilla remains the classic choice, but chocolate, cookies and cream, mint chocolate chip, and strawberry also taste delicious. Softer premium ice cream spreads more evenly between the cookies during assembly.
Can I use store-bought cookies instead of homemade cookies?
Yes, although homemade cookies stay softer after freezing and create a better texture overall. If using store-bought cookies, choose soft-baked styles rather than crispy varieties for easier eating.
Print
DIY Ice Cream Sandwiches
- Total Time: 3 hours 30 minutes
- Yield: 12 sandwiches 1x
Description
Soft homemade chocolate chip cookie ice cream sandwiches filled with creamy vanilla ice cream and rolled in festive toppings for the perfect frozen dessert.
Ingredients
- 2 and 1/4 cups all-purpose flour
- 1 and 1/2 teaspoons cornstarch
- 1 teaspoon baking soda
- 1/2 teaspoon salt
- 3/4 cup unsalted butter, softened
- 3/4 cup brown sugar
- 1/2 cup granulated sugar
- 1 large egg
- 1 egg yolk
- 2 teaspoons vanilla extract
- 1 and 1/4 cups mini semi-sweet chocolate chips
- 3 cups vanilla ice cream
- 1 cup mini chocolate chips, sprinkles, or chopped nuts
Instructions
- Preheat oven to 350°F and line baking sheets with parchment paper.
- Whisk flour, cornstarch, baking soda, and salt together in a bowl.
- Beat butter and sugars until creamy, then add egg, egg yolk, and vanilla extract.
- Mix dry ingredients into wet ingredients and fold in mini chocolate chips.
- Scoop dough onto baking sheets and bake for 12 to 13 minutes.
- Cool cookies completely on a wire rack.
- Add ice cream between two cookies and press gently together.
- Roll sandwich edges in toppings and wrap individually.
- Freeze sandwiches for at least 3 hours before serving.
Notes
- Use mini chocolate chips for softer cookies after freezing.
- Cool cookies fully before adding ice cream.
- Freeze sandwiches immediately after assembly for best texture.
- Prep Time: 30 minutes
- Cook Time: 13 minutes
- Category: Dessert
- Method: Baking
- Cuisine: American
Nutrition
- Serving Size: 1 sandwich
- Calories: 420
- Sugar: 31
- Sodium: 190
- Fat: 22
- Saturated Fat: 13
- Unsaturated Fat: 7
- Trans Fat: 0
- Carbohydrates: 51
- Fiber: 2
- Protein: 5
- Cholesterol: 58