
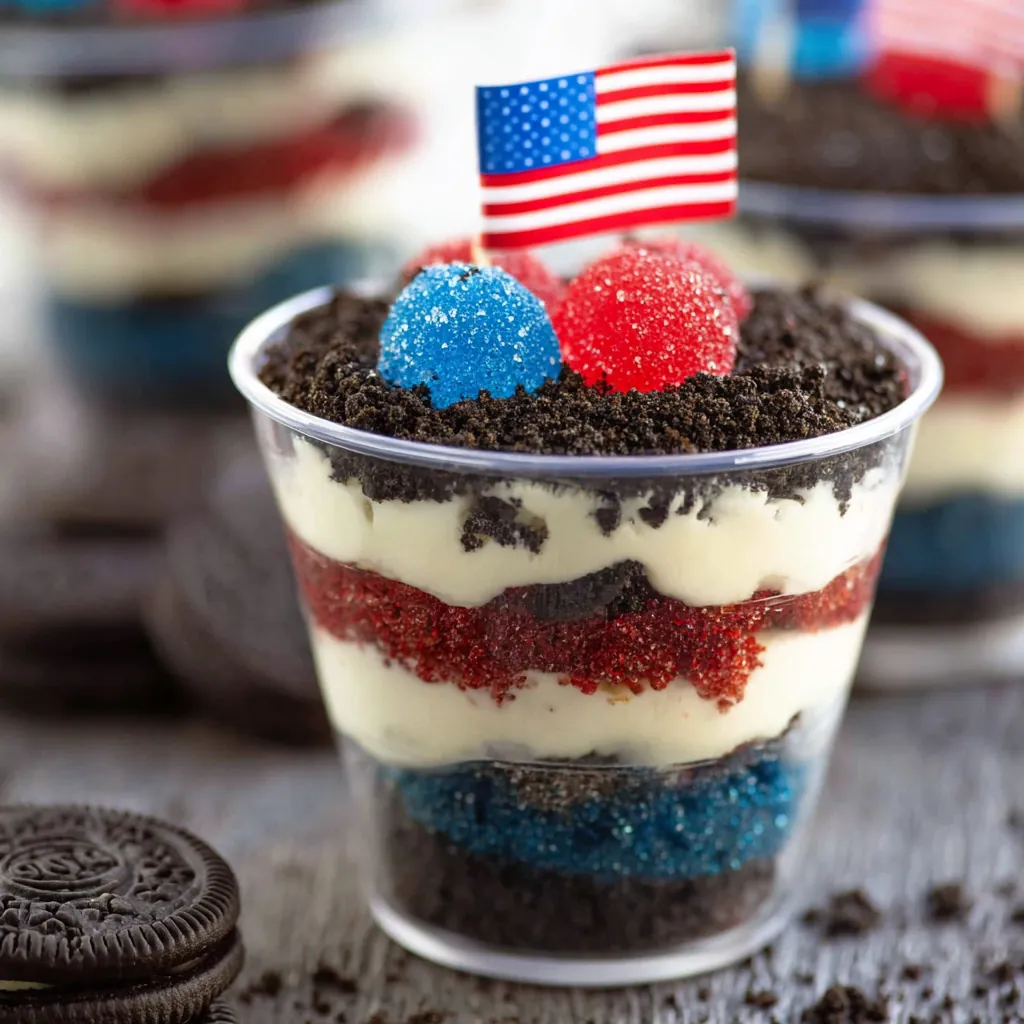
Red White and Blue Dirt Cups are a fun, festive, and easy treat that comes together in just minutes. This no-bake dessert layers crushed Oreos with creamy pudding and colorful red, white, and blue swirls, making it perfect for summer celebrations. Whether you’re planning a backyard barbecue or a holiday party, these Red White and Blue Dirt Cups bring both flavor and visual appeal. Plus, they require minimal effort, which makes them ideal for busy days. If you love simple desserts that still look impressive, this recipe delivers every time.
Story
Every summer gathering calls for something festive, and Red White and Blue Dirt Cups always stand out on the dessert table. I first made these for a Fourth of July picnic, and they quickly became a favorite among both kids and adults. The combination of creamy pudding and crunchy cookies creates a texture that feels indulgent yet simple.
What makes Red White and Blue Dirt Cups even better is how easy they are to customize. You can switch up toppings, adjust sweetness, or even let kids build their own cups. Because these are 4th of July Dirt Cups, they instantly bring a patriotic theme without requiring complicated decorating skills.
Over time, I found that these Red White and Blue Dirt Cups work for more than just holidays. They are perfect for birthdays, school events, or any time you want a colorful dessert. Since they are a Patriotic No-Bake Dessert, they save time while still delivering bold flavor and presentation.
Ingredients
- 2 boxes (3.4 oz each) cheesecake pudding mix
- 4 cups cold milk
- 19 Oreo cookies, crushed
- ¼ teaspoon red gel food dye
- ¼ teaspoon blue gel food dye
- 8 red and blue gummy worms
Step-by-Step Instructions
Preparing the Ingredients
Start by placing both boxes of pudding mix into a large mixing bowl. Add the cold milk and whisk until the mixture thickens into a smooth pudding. Then, divide the pudding into three separate bowls. Place 1 cup in one bowl, 1½ cups in another, and leave the remaining portion plain. Add blue gel dye to the smaller portion and mix thoroughly until evenly colored. Next, stir red gel dye into the larger portion until fully blended and vibrant.
Cooking Instructions
Line up your plastic cups on a clean surface to make assembly easier. Begin with one tablespoon of crushed Oreos at the bottom of each cup. Then, layer two tablespoons of blue pudding and spread it evenly. Add another tablespoon of crushed Oreos, followed by three tablespoons of white pudding. Continue with another Oreo layer, then spoon in four tablespoons of red pudding. Finish with a final layer of crushed Oreos on top. Garnish each cup with two gummy worms and a small flag topper before serving.
Tips for Perfect Results
Common Mistakes to Avoid
Avoid overmixing the pudding after it thickens, as this can make it too thin and affect layering. Also, do not skip evenly spreading each layer, because uneven layers can make the dessert look messy instead of clean and defined. Another common issue is using too much food coloring, which can create an artificial taste. Stick to small amounts for the best results.
Pro Tips for Better Flavor
Use chilled milk to help the pudding set faster and maintain a creamy texture. For extra crunch, add the Oreo layers just before serving so they stay crisp. If you want a richer flavor, try using chocolate pudding instead of cheesecake. These Oreo Pudding Cups taste even better when chilled for about 30 minutes before serving, as the layers settle beautifully.
Serving and Storage
How to Serve
Serve Red White and Blue Dirt Cups chilled for the best texture and flavor. They look great in clear cups because the layers show through, adding a festive touch. These cups pair well with other summer treats and drinks, making them a great addition to any party spread. Since they are a Kid Friendly Treat, they are easy to hand out and enjoy without utensils beyond a simple spoon.
How to Store Leftovers
Cover each cup with plastic wrap or place them in an airtight container before storing in the refrigerator. They will stay fresh for up to four days. Keep in mind that the cookies will soften over time as they absorb moisture from the pudding, but the flavor remains delicious.
Conclusion
Red White and Blue Dirt Cups combine simplicity, flavor, and festive charm into one easy dessert. With no baking required and minimal prep time, they are perfect for busy days or last-minute gatherings. The colorful layers make them visually appealing, while the creamy and crunchy textures keep everyone coming back for more. Once you try these, they will quickly become a go-to recipe for celebrations.
Discover more delicious recipes by following me on Facebook and Pinterest.
Frequently Asked Questions
Can I make Red White and Blue Dirt Cups ahead of time?
Yes, you can prepare them a day in advance and store them in the refrigerator. However, for the best texture, consider adding the final Oreo layer just before serving so it stays crunchy.
Can I use a different type of pudding?
Absolutely, you can substitute cheesecake pudding with vanilla or chocolate pudding. Each option gives a slightly different flavor while still keeping the dessert delicious and easy.
How can I make this dessert healthier?
You can use low-fat milk and sugar-free pudding mix to reduce calories. Additionally, you can limit the number of Oreo layers or use a lighter cookie alternative.
Print
Red White and Blue Dirt Cups
- Total Time: 10 minutes
- Yield: 4 cups 1x
- Diet: Vegetarian
Description
Festive no-bake dessert with Oreo layers and colorful pudding, perfect for summer parties.
Ingredients
- 2 boxes cheesecake pudding mix
- 4 cups milk
- 19 Oreo cookies crushed
- 1/4 teaspoon red gel food dye
- 1/4 teaspoon blue gel food dye
- 8 red and blue gummy worms
Instructions
- Mix pudding with milk until thick
- Divide pudding into three bowls
- Color one blue and one red
- Layer Oreos and pudding in cups
- Repeat layers evenly
- Top with crushed Oreos
- Add gummy worms and serve
Notes
- Store in refrigerator up to four days
- Add Oreo topping before serving for crunch
- Prep Time: 10 minutes
- Category: Dessert
- Method: No-Bake
- Cuisine: American
Nutrition
- Serving Size: 1 cup
- Calories: 451
- Sugar: 44
- Sodium: 347
- Fat: 16
- Saturated Fat: 6
- Unsaturated Fat: 9
- Trans Fat: 0.2
- Carbohydrates: 68
- Fiber: 2
- Protein: 12
- Cholesterol: 19