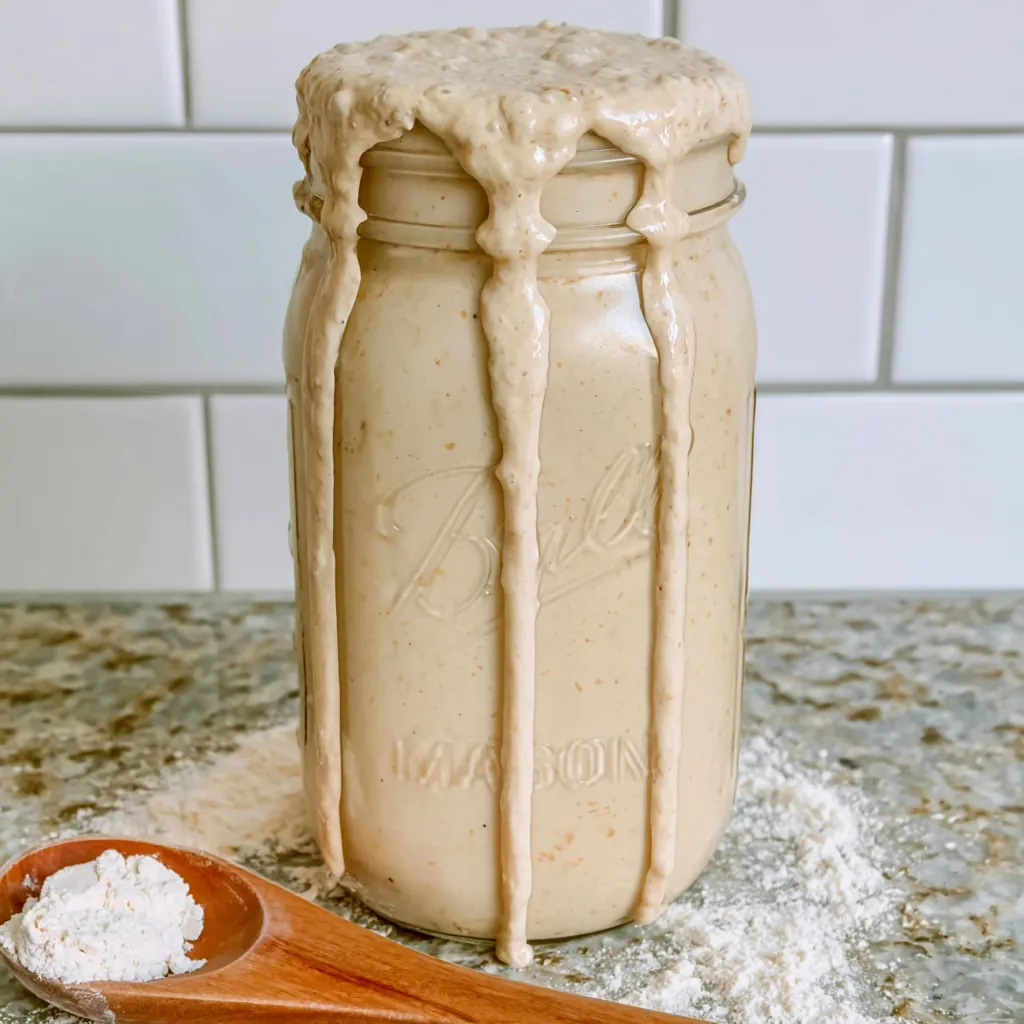
Making a sourdough starter requires only flour, water, warmth, and a little patience. Over several days, naturally occurring yeast and beneficial bacteria transform those simple ingredients into a lively culture that can raise bread without commercial yeast. This beginner-friendly method gives you a dependable feeding routine, clear measurements, and practical signs to watch each day. Therefore, you never need to guess whether the mixture is progressing normally. Once your sourdough starter becomes bubbly, pleasantly tangy, and strong enough to double after feeding, you can use it in bread, rolls, pizza dough, pancakes, and many other recipes.
Story
When I first considered sourdough, the feeding schedules and unfamiliar terms made the process sound much harder than ordinary baking. However, I soon learned that a sourdough starter is simply a fermented mixture of flour and water. Regular feedings give the natural microorganisms fresh food, while discarding keeps the quantity manageable and prevents excessive acidity. This homemade sourdough starter needs only a few minutes of attention each day. Moreover, the visible progress makes the process rewarding. Small bubbles appear first, followed by a tangy aroma and predictable growth. Although some starters mature within seven days, others need ten to fourteen days. Therefore, follow the starter’s activity rather than the calendar alone. A mature sourdough starter should rise reliably, hold many bubbles, and smell pleasantly fermented. With steady care, this sourdough starter can become a lasting kitchen culture that supports years of baking.
Ingredients
The measurements below create one active starter while keeping daily waste manageable. For the most accurate and consistent results, measure the flour and water with a digital kitchen scale.
- 50 grams whole wheat or rye flour for the first mixture
- 50 grams filtered or dechlorinated room-temperature water
- 50 grams unbleached all-purpose flour for each feeding
- 50 grams filtered or dechlorinated water for each feeding
- 50 grams retained starter for each feeding
- Extra flour and water as needed through days eight to fourteen
Step-by-Step Instructions
Follow the same basic rhythm throughout the week: retain a measured portion, add fresh flour and water, mix thoroughly, cover loosely, and place the jar in a comfortably warm location. Because every kitchen differs, activity may develop faster or slower.
Preparing the Ingredients
Choose a clean, wide-mouth glass jar that holds at least two cups. Then weigh the empty jar and record its weight, which makes later discard measurements easier. Use unbleached flour because it supports dependable fermentation. Whole wheat or rye flour often encourages early activity, so either works well on the first day. Next, use filtered water at room temperature. Very cold water slows fermentation, while hot water can damage the developing culture. Finally, gather a clean spoon or silicone spatula, a loose-fitting lid, and a rubber band. Place the band around the jar at the mixture’s starting level so you can track each rise. Keep everything clean, although you do not need to sterilize the equipment. This simple setup creates an effective diy bread starter station without special tools.
Cooking Instructions
On day one, mix 50 grams whole wheat or rye flour with 50 grams water until no dry flour remains. Cover the jar loosely and leave it at 70°F to 78°F for 24 hours. On day two, keep 50 grams of the mixture and remove the rest. Add 50 grams all-purpose flour and 50 grams water, stir well, mark the level, and rest for another 24 hours. Repeat that process on day three. You may notice bubbles, a strong aroma, or a sudden rise followed by a fall. Continue feeding every 24 hours through day four. Once the starter shows steady bubbling and begins rising between feedings, switch to feedings every 12 hours. For each feeding, keep 50 grams starter, then mix in 50 grams flour and 50 grams water. Continue this routine through day seven. Your starter becomes ready when it doubles within four to eight hours after feeding for several consecutive cycles. This bubbly starter guide depends on consistent growth, not one isolated rise.
Tips for Perfect Results
A stable temperature, accurate feeding ratio, and regular schedule help your starter develop a balanced yeast and bacterial community. Nevertheless, a quiet day does not mean failure. Continue feeding unless you see mold or unusual colored streaks.
Common Mistakes to Avoid
Do not seal the jar tightly because fermentation creates gas that needs room to escape. Likewise, avoid placing the starter beside a hot stove, in direct sunlight, or inside an oven that someone might accidentally turn on. Do not add commercial yeast, sugar, honey, or fruit because flour already supplies what the culture needs. Additionally, avoid guessing measurements with cups whenever possible. Equal volumes of flour and water do not weigh the same, so cup measurements can create a thin mixture that struggles to trap gas. Do not feed too frequently before activity begins, since excessive fresh flour may dilute the developing microorganisms. Finally, never continue using a starter with fuzzy mold or pink, orange, or red discoloration. Throw it away, wash the container thoroughly, and begin again.
Pro Tips for Better Flavor
Use whole grain flour for the first mixture because its natural nutrients often support faster early fermentation. Afterward, unbleached all-purpose flour creates a mild, versatile culture. For more robust activity, replace ten grams of the feeding flour with rye flour. Keep the starter around 75°F when possible, since moderate warmth encourages steady growth without pushing the culture toward harsh acidity. Furthermore, feed at the starter’s peak or shortly after it begins falling. This timing keeps the culture strong and gives the microorganisms fresh food when they need it. Marking the jar after every feeding makes that rhythm easy to recognize. During sourdough baking for beginners, focus on aroma and predictable expansion. A healthy starter may smell fruity, yeasty, yogurt-like, or pleasantly sour as it moves through each feeding cycle.
Serving and Storage
Although sourdough starter is not eaten alone, it becomes the natural leavening ingredient in countless baked recipes. Once mature, keep enough starter for your baking plans while maintaining a small portion for future feedings.
How to Serve
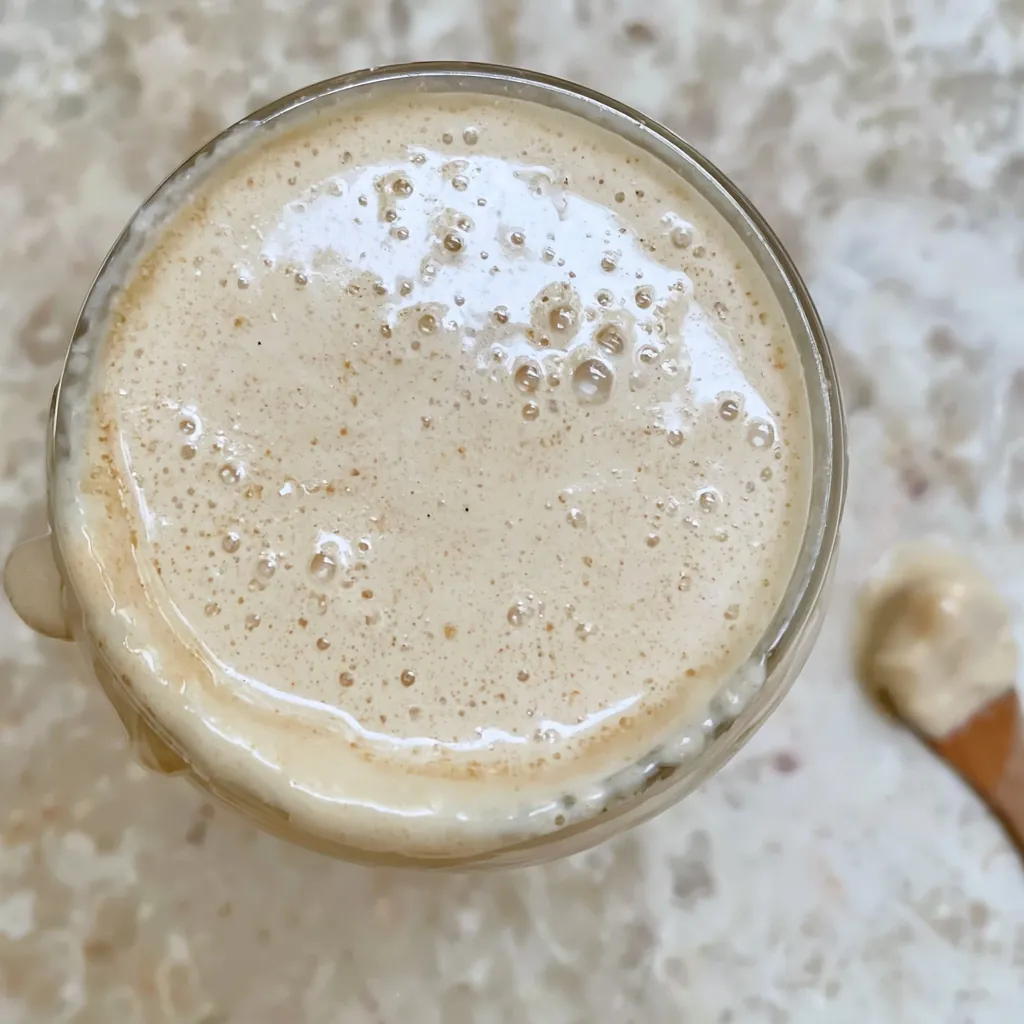
Use the starter when it reaches peak activity, usually after it doubles and before the center collapses. At that stage, the surface looks rounded, the texture feels airy, and bubbles appear throughout the jar. Measure the amount required by your bread recipe, then leave at least 20 to 50 grams in the jar for maintenance. You can use active starter in artisan bread, sandwich loaves, bagels, rolls, pizza crust, focaccia, waffles, and cinnamon rolls. Meanwhile, collect unfed discard in a separate refrigerated container for pancakes, crackers, muffins, cookies, biscuits, and quick breads. The float test may provide another clue: place a small spoonful of ripe starter in water and check whether it floats. However, reliable doubling gives a more dependable sign because some healthy starters sink after stirring or when made with certain flours.
How to Store Leftovers
Keep the starter at room temperature and feed it every 12 to 24 hours when you bake several times each week. However, refrigerate it when you bake only occasionally. Feed the starter, let it begin fermenting for one or two hours, cover it loosely, and place it in the refrigerator. Feed a refrigerated starter about once each week. Before baking, remove it from the refrigerator and give it one or more room-temperature feedings until it doubles predictably again. If gray or brown liquid forms on top, the starter is usually hungry rather than spoiled. Pour off the liquid for a milder flavor or stir it in for greater acidity, then feed the starter. Conversely, discard the entire culture when you find fuzzy mold, rotten odors, or pink, red, or orange coloring.
Conclusion
A strong sourdough starter grows through consistency rather than complicated equipment or perfect timing. Mix flour and water, maintain equal feeding weights, keep the jar comfortably warm, and watch how the culture responds. Although the first week may include slow days, unusual smells, and unpredictable rises, steady feedings usually create a reliable starter. Once it doubles regularly and fills with bubbles, use it at peak activity in your favorite naturally leavened recipes. Then maintain a small amount in the refrigerator or on the counter. Start today, follow the simple rhythm, and soon you will have a lively starter ready for homemade bread.
Discover more delicious recipes by following me on Facebook and Pinterest.
Frequently Asked Questions
These answers cover the most common concerns that arise while creating and maintaining a new starter. When the starter behaves differently from the calendar, use its appearance, smell, and growth pattern to guide your next feeding.
Why Is My Sourdough Starter Not Rising?
A young starter may need more time, especially in a cool kitchen. Move it to a stable location around 75°F, use unbleached flour, and feed equal weights of retained starter, flour, and water. Also, check your water because heavily chlorinated water may slow activity. If the mixture looks very thin, weigh the ingredients instead of measuring equal cups. Continue regular feedings for up to fourteen days unless mold or colored contamination appears. A temporary burst of activity during the first few days may come from early bacterial changes, so a later quiet period often remains normal. Consistent doubling after several feedings signals true maturity.
How Do I Know When the Starter Is Ready?
A ready starter should double or triple within four to eight hours after a 1:1:1 feeding by weight. It should also contain bubbles throughout the mixture and smell clean, tangy, fruity, or yeasty. Look for a rounded top at peak activity and streaks on the jar after it begins falling. Although many bakers use the float test, do not rely on that test alone. Stirring can release trapped gas, while whole grain starters may remain dense enough to sink. Instead, track the rise with a rubber band and confirm that the starter repeats the same strong growth over several feeding cycles.
Can I Make Sourdough Starter With All-Purpose Flour?
Yes, unbleached all-purpose flour can create and maintain a healthy starter. However, whole wheat or rye flour may produce quicker early activity because those flours contain more nutrients and microorganisms. You can begin with whole grain flour and switch to all-purpose flour during later feedings. Alternatively, use mostly all-purpose flour with a small amount of rye or whole wheat flour when the culture needs extra support. Avoid bleached flour when possible because processing may make fermentation less dependable. Regardless of flour type, use consistent weights, maintain a warm temperature, and continue feeding until the starter rises predictably.
Sourdough Starter
- Total Time: 7 days
- Yield: 1 active sourdough starter 1x
- Diet: Vegan
Description
A simple seven-day sourdough starter made with flour and filtered water. Daily feedings create a bubbly, tangy natural culture for bread, rolls, pizza dough, and other sourdough recipes.
Ingredients
- 50 grams whole wheat or rye flour for the first mixture
- 50 grams filtered or dechlorinated room-temperature water
- 50 grams unbleached all-purpose flour for each feeding
- 50 grams filtered or dechlorinated water for each feeding
- 50 grams retained sourdough starter for each feeding
- Extra flour and filtered water as needed through days eight to fourteen
Instructions
- Day 1: Mix 50 grams whole wheat or rye flour with 50 grams filtered water in a clean glass jar until no dry flour remains.
- Cover the jar loosely, mark the starting level, and leave it at 70°F to 78°F for 24 hours.
- Day 2: Retain 50 grams of starter and discard the remainder. Add 50 grams all-purpose flour and 50 grams water.
- Stir thoroughly, cover loosely, mark the level, and rest for another 24 hours.
- Day 3: Repeat the process by keeping 50 grams starter and feeding it with 50 grams flour and 50 grams water.
- Day 4: Repeat the same feeding. Watch for bubbles, a tangy aroma, and visible rising and falling.
- When the starter begins rising consistently, feed it every 12 hours using 50 grams starter, 50 grams flour, and 50 grams water.
- Continue the twice-daily feeding routine through day 7.
- Check the starter after each feeding. It is ready when it doubles within four to eight hours for several consecutive cycles.
- If it does not double reliably by day 7, continue feeding every 12 hours through day 10 or day 14.
- Use the active starter near peak rise, leaving at least 20 to 50 grams in the jar for future feedings.
Notes
- Use a digital scale for the most consistent feeding ratio.
- Keep the starter around 75°F for steady fermentation.
- Use filtered or dechlorinated water when possible.
- A loose lid works better than an airtight seal.
- Gray or brown liquid usually means the starter needs food.
- Discard the starter if you see fuzzy mold or pink, red, or orange discoloration.
- The float test can provide an extra clue, but predictable doubling gives a more dependable readiness test.
- Store an established starter in the refrigerator and feed it about once each week when you bake occasionally.
- Prep Time: 10 minutes
- Category: Bread Starter
- Method: Fermentation
- Cuisine: American
Nutrition
- Serving Size: 1 tablespoon
- Calories: 14
- Sugar: 0
- Sodium: 0
- Fat: 0
- Saturated Fat: 0
- Unsaturated Fat: 0
- Trans Fat: 0
- Carbohydrates: 3
- Fiber: 0
- Protein: 0
- Cholesterol: 0