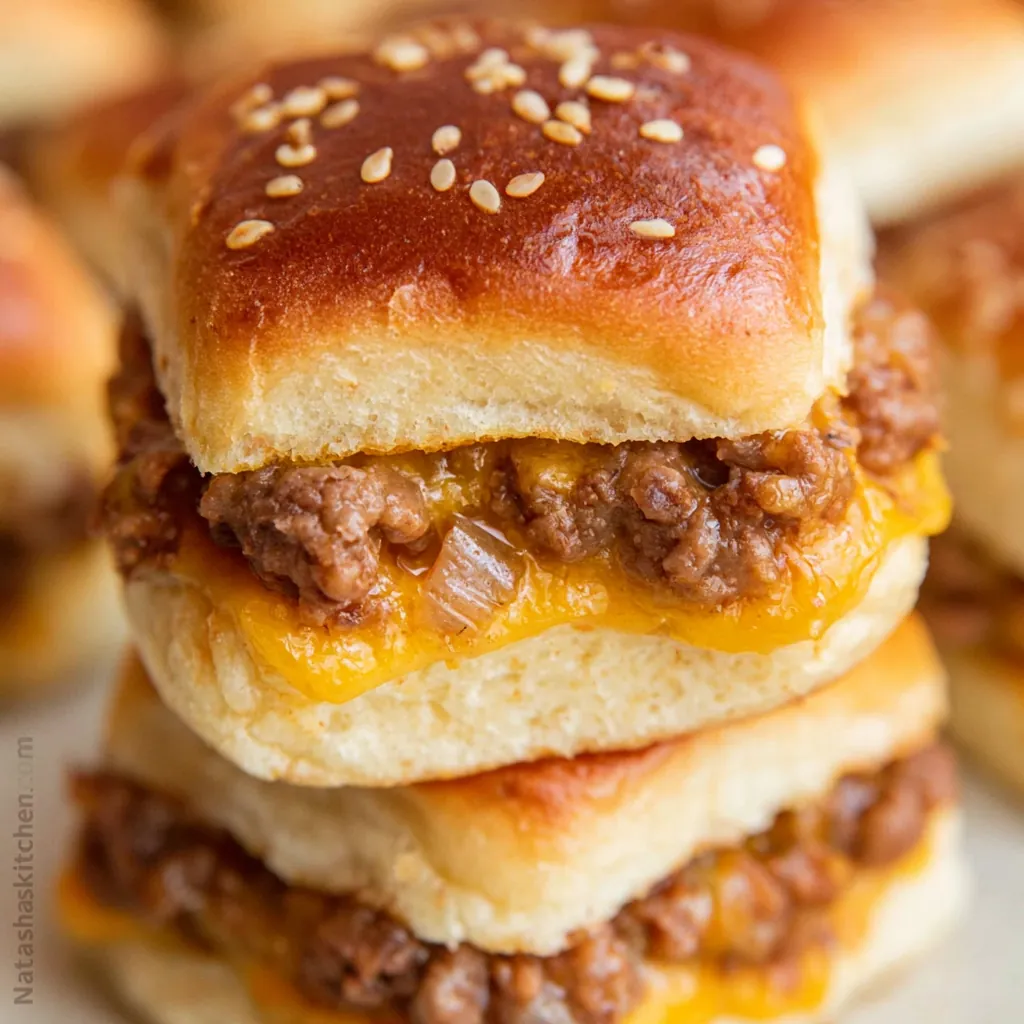
Cheeseburger Sliders bring everything you love about a classic burger into a warm, pull-apart tray that feeds a crowd fast. Each soft roll holds savory ground beef, melted cheddar, tender onion, and a buttery sesame topping. Because the recipe takes only 30 minutes, it works for busy weeknights, game-day spreads, potlucks, birthdays, and casual family dinners. These sliders also reheat well, so you can prepare them early and serve them when guests arrive. With simple ingredients and straightforward steps, this dependable recipe gives you juicy meat, golden rolls, and plenty of melted cheese in every bite.
Why These Cheeseburger Sliders Work
I first started making Cheeseburger Sliders when I needed a fast dinner that felt more exciting than ordinary sandwiches. Full-size burgers required several batches at the stove, but one tray of sliders fed everyone at once. The first pan disappeared before the fries reached the table, and the recipe quickly became a regular choice for gatherings. These Cheeseburger Sliders stay juicy because mayonnaise adds moisture to the seasoned beef, while sliced cheese under the filling protects the rolls from excess juices. Shredded cheddar melts over the top, so every slider holds together when cut. Even better, this 30-minute recipe needs no grill, individual patties, or complicated toppings. You cook one skillet of beef, layer the rolls, and bake until the cheese bubbles. As a result, Cheeseburger Sliders give you classic burger flavor with less work, fewer dishes, and easy serving.
Ingredients
Use 90/10 or 93/7 ground beef for rich flavor without excessive grease. Medium cheddar gives the filling a smooth, familiar burger taste, although sharp cheddar works when you prefer a stronger finish.
- 2 pounds lean ground beef
- 1/2 tablespoon olive oil
- 1 teaspoon salt
- 1 teaspoon black pepper
- 1 teaspoon garlic powder
- 1/2 large yellow onion, finely diced
- 1/4 cup mayonnaise
- 8 slices medium cheddar cheese
- 6 ounces medium cheddar cheese, freshly shredded
- 24 connected dinner rolls, or two 12-roll packages
- 2 tablespoons unsalted butter, melted
- Extra softened butter for greasing the baking sheet
- 1 tablespoon sesame seeds
Step-by-Step Instructions
Follow the preparation and cooking order below so the rolls stay tender, the beef remains moist, and the cheese melts evenly. Keep the dinner rolls connected while slicing because the two large slabs make assembly faster and prevent gaps in the filling.
Preparing the Ingredients
Heat the oven to 350°F, then coat the bottom of a rimmed baking sheet or a 9-by-13-inch baking dish with softened butter. Dice the onion finely so it softens quickly and spreads evenly through the meat. Shred the cheddar from a block because freshly shredded cheese melts more smoothly than many packaged varieties. Keep the rolls attached, then use a long serrated knife to slice the entire group horizontally through the center. Lift off the top slab and set it aside. Arrange the bottom slab on the prepared pan. Lay the sliced cheddar across the bread, trimming or overlapping pieces as needed to cover the surface. This cheese layer creates a flavorful barrier between the rolls and the beef, which helps the bottoms stay soft without turning wet.
Cooking Instructions
Place a large skillet over medium-high heat and add the olive oil. Add the diced onion and cook for about one minute, then add the ground beef. Break the meat into small crumbles with a sturdy spatula. Sprinkle in the salt, black pepper, and garlic powder. Continue cooking while stirring often until no pink remains, about six to eight minutes. Do not cook the beef until dry. Tilt the skillet carefully and spoon away excess fat, then remove the pan from the heat. Stir in the mayonnaise until it lightly coats the meat. Spread the beef evenly over the sliced cheese and press the edges into a neat layer. Scatter the shredded cheddar over the beef, then replace the top slab of rolls. Brush the tops with melted butter and sprinkle with sesame seeds. Bake for 12 to 15 minutes, until the cheese melts and the rolls turn golden. Rest for five minutes, then cut along the roll seams and serve warm.
Tips for Perfect Results
Small choices make a major difference with Cheeseburger Sliders. Choose connected rolls, drain extra grease, spread each layer to the edges, and watch the tops during the final minutes.
Common Mistakes to Avoid
Avoid using very fatty ground beef because excess grease can soak the rolls and make the filling slide out. Drain the skillet before adding mayonnaise, but leave the seasoned juices that cling to the meat. Also, avoid piling the beef in the center. Spread it firmly into the corners so every portion contains enough filling.
Pro Tips for Better Flavor
For especially juicy beef sliders, stir the mayonnaise into warm meat after removing the skillet from the burner.
Serving and Storage
Serve Cheeseburger Sliders while the cheese remains hot and stretchy, or prepare them ahead for an easy gathering.
How to Serve
Set the warm sliders on a platter with small bowls of ketchup, mustard, burger sauce, and extra pickles. For a weeknight meal, pair two or three sliders with oven fries, sweet potato wedges, coleslaw, a green salad, or crisp vegetables. However, add watery toppings after baking so the bread stays tender rather than soggy.

How to Store Leftovers
Cool leftovers completely, then place them in an airtight container and refrigerate for up to three days. For the best texture, reheat Cheeseburger Sliders in a 325°F oven for 10 to 12 minutes. Cover them loosely with foil for the first several minutes, then uncover them so the tops regain a light crispness. An air fryer also works well at 320°F for three to five minutes, although you may need to cook in batches. The microwave heats them quickly, but it softens the bread, so use short 20-second intervals. These sliders also work as make-ahead mini burgers. Assemble the beef and cheese layers up to one day early, cover the pan, and refrigerate. Add the butter and sesame seeds just before baking, then allow a few extra minutes in the oven.
Conclusion
Cheeseburger Sliders turn a familiar comfort-food favorite into a simple tray meal that cooks quickly and serves easily. The seasoned beef stays moist, two layers of cheddar create plenty of melted cheese, and buttery sesame rolls bring the whole recipe together. Because you can assemble the sliders early, reheat leftovers, and adjust the toppings, this recipe fits weeknight dinners as easily as parties. Gather the ingredients, heat the oven, and make a pan the next time you need something warm, filling, and crowd-friendly. Once everyone pulls apart the first golden slider, this recipe may become one of your most requested meals.
Discover more delicious recipes by following me on Facebook and Pinterest.
Frequently Asked Questions
The answers below cover substitutions, advance preparation, and ways to prevent soggy rolls. These practical details help you adapt the recipe without losing its juicy texture or easy pull-apart shape.
Can I Make Cheeseburger Sliders Ahead of Time?
Yes. Cook the beef, drain it, and stir in the mayonnaise. Let the mixture cool slightly, then assemble the sliders with both cheese layers. Cover the pan tightly and refrigerate it for up to 24 hours. Wait to brush the tops with melted butter and add sesame seeds until you plan to bake. Since the chilled filling lowers the starting temperature, add about three to five minutes to the baking time. Check the center before serving and continue baking until the cheese melts completely. This approach works especially well for parties because you can clean the kitchen early, then place the tray in the oven shortly before guests eat.
How Do I Keep the Bottoms From Getting Soggy?
Start with lean ground beef and spoon off excess fat after cooking. Next, place sliced cheese directly on the bottom rolls before adding the meat. The cheese melts into a thin barrier that limits moisture from reaching the bread. Keep wet toppings, including tomatoes and juicy pickles, out of the baked layers unless you drain and dry them carefully. Also, do not cover the hot sliders tightly after baking because trapped steam softens the tops and bottoms. Let the tray rest uncovered for five minutes, then serve. When storing leftovers, cool them before sealing the container so condensation does not collect around the bread.
Can I Use Different Cheese or Rolls?
Absolutely. Cheddar gives Cheeseburger Sliders a classic flavor, but American cheese melts smoothly, Monterey Jack tastes mild and creamy, and pepper Jack adds gentle heat. You can also combine two cheeses for more flavor and a better cheese pull. Hawaiian rolls add sweetness, while plain dinner rolls, brioche rolls, or potato rolls create a less sweet result. Choose rolls that come connected in a slab because they make assembly easier. If your rolls vary greatly in size, adjust the amount of filling so each slider remains easy to hold. Regardless of the bread, watch the baking time closely because smaller or darker rolls may brown faster.


Cheeseburger Sliders
- Total Time: 30 minutes
- Yield: 24 sliders 1x
Description
Juicy ground beef, tender onion, and two layers of melted cheddar fill soft dinner rolls in these easy 30-minute Cheeseburger Sliders. A buttery sesame topping gives the pull-apart sliders a golden finish that makes them perfect for parties, game day, potlucks, or a quick family dinner.
Ingredients
- 2 pounds lean ground beef, 90/10 or 93/7
- 1/2 tablespoon olive oil
- 1 teaspoon salt
- 1 teaspoon black pepper
- 1 teaspoon garlic powder
- 1/2 large yellow onion, finely diced
- 1/4 cup mayonnaise
- 8 slices medium cheddar cheese
- 6 ounces medium cheddar cheese, freshly shredded
- 24 connected dinner rolls
- 2 tablespoons unsalted butter, melted
- Extra softened butter for greasing the baking sheet
- 1 tablespoon sesame seeds
Instructions
- Preheat the oven to 350°F and grease the bottom of a rimmed baking sheet or 9-by-13-inch baking dish with softened butter.
- Place a large skillet over medium-high heat and add the olive oil.
- Add the diced onion, then add the ground beef and break it into small crumbles with a spatula.
- Season the beef with salt, black pepper, and garlic powder.
- Cook for 6 to 8 minutes, stirring often, until the beef is fully cooked and no pink remains.
- Tilt the skillet carefully and spoon away the excess fat.
- Remove the skillet from the heat and stir the mayonnaise into the warm beef mixture.
- Keep the dinner rolls connected and slice the entire group horizontally through the center with a serrated knife.
- Place the bottom slab of rolls on the prepared baking sheet.
- Arrange the sliced cheddar evenly over the bottom rolls.
- Spread the beef mixture evenly over the sliced cheese and press it into the corners.
- Scatter the shredded cheddar evenly over the beef.
- Place the top slab of rolls over the shredded cheese.
- Brush the tops with melted butter and sprinkle them evenly with sesame seeds.
- Bake for 12 to 15 minutes, until the cheese melts and the tops turn golden brown.
- Rest the sliders for 5 minutes, then cut along the roll seams and serve warm.
Notes
- Use 90/10 or 93/7 ground beef to prevent excess grease from soaking the rolls.
- Drain the cooked beef before adding the mayonnaise.
- Keep the rolls connected while slicing and assembling for faster, neater preparation.
- The sliced cheese under the beef creates a moisture barrier that helps keep the bottom rolls from becoming soggy.
- For make-ahead sliders, assemble them up to 24 hours in advance, cover, and refrigerate.
- Brush with melted butter and add sesame seeds just before baking.
- Chilled sliders may need 3 to 5 additional minutes in the oven.
- Store cooled leftovers in an airtight container in the refrigerator for up to 3 days.
- Reheat in a 325°F oven for 10 to 12 minutes for the best texture.
- Prep Time: 8 minutes
- Cook Time: 22 minutes
- Category: Appetizer
- Method: Baking
- Cuisine: American
Nutrition
- Serving Size: 1 slider
- Calories: 266
- Sugar: 3
- Sodium: 430
- Fat: 13
- Saturated Fat: 6
- Unsaturated Fat: 6
- Trans Fat: 0
- Carbohydrates: 21
- Fiber: 1
- Protein: 16
- Cholesterol: 45